






Improving balance and everyday mobility does not require intense workouts or complicated equipment. Simple, low-impact exercises can help you move with greater control, strengthen important muscles, and feel more confident during daily activities.
These exercises are designed to be gentle on the joints while supporting movements such as standing up, walking, reaching, turning, and climbing stairs. You can practice many of them at home with a sturdy chair, a wall, or a countertop nearby for support.
Why Balance and Mobility Matter
Balance helps you stay steady while standing and moving. Mobility refers to how comfortably and freely you can move your joints and body through everyday positions.
Together, balance and mobility can make routine activities easier, including:
– Getting in and out of a chair
– Walking across different surfaces
– Reaching for items on a shelf
– Turning around safely
– Stepping over small obstacles
– Maintaining good posture while standing
– Moving between rooms with greater confidence
Regular practice can also help you become more aware of your body position. This awareness, sometimes called body control, allows you to make smoother and more deliberate movements.
Getting Started Safely
Choose a clear, well-lit area with enough room to move. Wear comfortable clothing and supportive footwear. Keep a sturdy chair, countertop, or wall within reach when practicing standing exercises.
Start slowly and focus on controlled movement rather than speed. Breathe naturally, and take breaks whenever you need them. If an exercise causes pain, stop and choose a gentler version.
A simple routine can begin with 10 to 15 minutes, two or three times per week. As the movements become more familiar, you can gradually increase the time or number of repetitions.
1. Seated Marching
Seated marching gently works the hips and thighs while encouraging steady posture. It is a useful starting exercise if standing movements feel challenging.
How to do it
- Sit near the front of a sturdy chair with both feet flat on the floor.
- Sit tall with your shoulders relaxed.
- Slowly lift one foot a few inches from the floor.
- Lower it with control, then lift the other foot.
- Continue alternating sides for 30 to 60 seconds.
Keep your upper body as still as possible. Avoid leaning from side to side. To make the movement easier, lift your feet only slightly.
2. Sit to Stand
Standing up from a chair is one of the most practical movements to practice. This exercise strengthens the legs and encourages controlled transitions.
How to do it
- Sit in a sturdy chair with your feet about hip-width apart.
- Move slightly toward the edge of the seat.
- Lean forward gently, keeping your back comfortable and straight.
- Press through your feet to stand.
- Pause briefly, then slowly lower yourself back into the chair.
Try five to ten repetitions. Use your hands on the chair or your thighs for light assistance if needed. Avoid dropping quickly into the seat.
3. Supported Heel Raises
Heel raises strengthen the lower legs and help you practice shifting weight while standing.
How to do it
- Stand behind a sturdy chair or face a countertop.
- Place your hands lightly on the support.
- Slowly lift your heels so you rise onto the balls of your feet.
- Pause for a moment.
- Lower your heels with control.
Repeat eight to 12 times. Keep your weight evenly distributed between both feet, and avoid leaning forward.
4. Toe Taps
Toe taps help improve leg control and the ability to shift weight from one side to the other.
How to do it
- Stand behind a chair or next to a countertop.
- Keep one foot planted firmly on the floor.
- Tap the toes of the other foot lightly onto a small object, such as a low book.
- Return the foot to the starting position.
- Alternate legs.
Perform eight to ten taps per side. The object should be low enough that you do not need to lift your leg high. Keep the movement slow and controlled.
5. Side Steps
Side steps strengthen the muscles around the hips and legs while supporting movement in different directions.
How to do it
- Stand near a countertop or along a clear wall.
- Take a small step to the right.
- Bring the other foot in to meet it.
- Continue for several steps.
- Repeat in the opposite direction.
Keep your toes facing forward and your knees relaxed. Avoid crossing one foot over the other. Practice moving slowly, with light support available.
6. Heel to Toe Walking
This exercise challenges balance and encourages a steady, controlled walking pattern. Practice it beside a countertop or in a hallway where support is close by.
How to do it
- Stand tall with one hand near a stable surface.
- Place one foot directly in front of the other, as if walking along a line.
- Shift your weight forward carefully.
- Bring the next foot in front of the first.
- Continue for five to ten steps, then turn slowly.
If this feels difficult, leave a small gap between your feet rather than placing them directly in line. Look forward instead of constantly looking down.
7. Gentle Weight Shifts
Weight shifts are a simple way to practice balance and improve awareness of your center of gravity.
How to do it
- Stand with your feet comfortably apart and hold a stable surface lightly.
- Slowly shift your weight toward the right foot.
- Return to the center.
- Shift your weight toward the left foot.
- Repeat several times.
You can also shift your weight slightly forward and backward. Keep both feet connected to the floor, and use a small range of motion.
8. Ankle Circles
Ankle mobility supports walking, stepping, and changing direction. Ankle circles can be performed while seated or standing with support.
How to do it
- Sit in a chair or stand while holding a sturdy surface.
- Lift one foot slightly from the floor.
- Slowly circle the ankle in one direction.
- Reverse the direction.
- Switch sides.
Perform five circles in each direction per ankle. Keep the movement smooth rather than forcing a large circle.
Creating a Simple Weekly Routine
A balanced routine can include exercises for strength, mobility, and balance. For example:
Two or three days per week
– Seated marching: 30 to 60 seconds
– Sit to stand: five to ten repetitions
– Heel raises: eight to 12 repetitions
– Side steps: five steps in each direction
– Weight shifts: five repetitions per direction
– Ankle circles: five each way per ankle
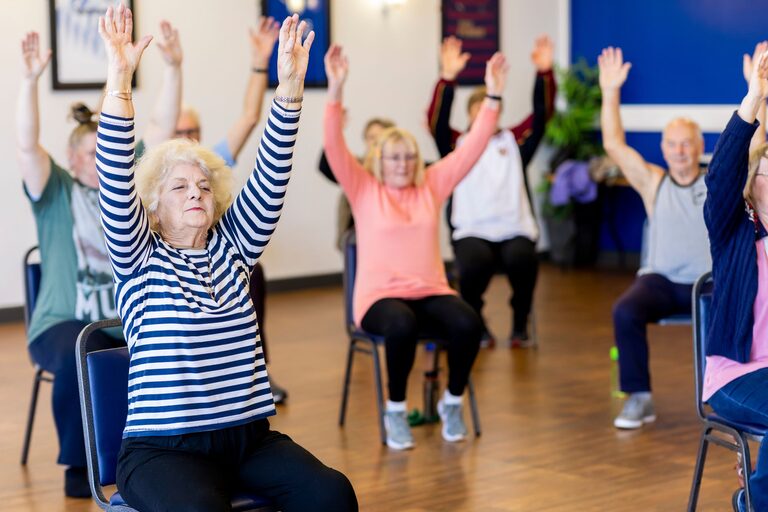
You can finish with a few relaxed stretches, such as reaching both arms overhead or gently turning your shoulders from side to side. Keep stretches comfortable and avoid bouncing.
Tips for Making Progress
Small, consistent improvements are often more useful than occasional intense sessions. Consider these tips:
– Practice at a regular time of day.
– Keep movements slow and deliberate.
– Increase repetitions gradually.
– Use less hand support only when you feel steady.
– Focus on good posture and relaxed breathing.
– Track how the exercises feel from week to week.
– Add short walks when comfortable.
Everyday activities can also become opportunities to practice mobility. Stand tall while waiting for water to boil, take careful side steps along a counter, or perform a few seated marches during a break.
When to Adjust Your Routine
Balance and mobility can vary from day to day. If you feel unusually tired, unsteady, or uncomfortable, shorten the routine or choose seated exercises instead. Keep your practice area free of loose rugs, cords, and clutter.
If you are unsure whether an exercise is appropriate for your personal needs, consider asking a qualified fitness professional for guidance. The goal is steady, comfortable movement that supports your daily life—not pushing through discomfort.
With regular practice, low-impact exercises can help you build greater control, confidence, and ease in the movements you use every day.